depth of field (DOF) is the distance between the nearest and farthest objects in a scene that appear acceptably sharp in an image. when creating depth of field in Photoshop many users use Gaussian blur or other techniques that hardly look realistic or even close to the depth of field a real camera creates.
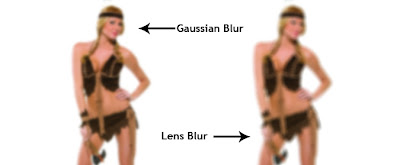
this tutorial will show you Photoshop Tutorial to Create Realistic Depth of Field using Depth Maps. Using Gaussian Blur to create Depth of Field is not the best way of doing this and you clearly see that on the edges of objects and small details. Take a look at the example below. As you can see, the Lens blur is more realistic.
What are depth maps
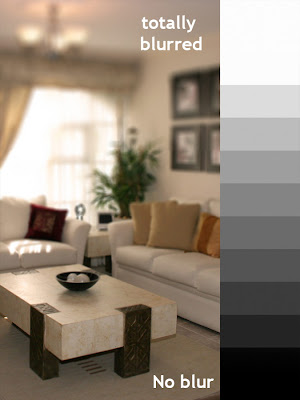
A depth map in Photoshop is nothing more than a gray scale image used as alpha channel. It can be use with the Lens Blur filter to create “selective blur”. The filter applies a different amount of blur to each shade of gray. The darker the shade of gray the less blur is applied to your image. Take a look at the image below. The gradient on the right is the gradient used on the channels as an alpha layer.Read Photography tip: motion blur
Simulating depth of field on different distances
For a realistic depth of field effect, in Photoshop you must apply different amounts of blur to objects depending on their distance to the camera just like on a real camera. We are going to do that using depth maps. We will create a depth map manually by applying different shades of gray to the objects depending on their distance. On our depth map, closer objects will be darker and objects that are further away will have a lighter gray.
A practical example
I took a photo from the internet and I placed a few balls at different distances.Creating the depth map
The next step is to start creating the depth map. As I said, the only way of doing this is by hand because we want solid gray colors. Just turning the image to black and white will not work.The shade of gray you apply to each object actually depends on which object you want to be in focus and paint that object in black.
For example, if you want the yellow ball to be in focus, you should paint it in pure black and the other ones in different shades of gray depending on their distance from the yellow ball. It might be confusing but if you see it it’s easy to understand.
The first thing you should do is create a new layer and draw black to white gradient depending on how you want your depth of field. In my photo, the window at the end of the corridor is the furthest away from the camera and the ceiling and floor gradually come closer to the camera. So, this is how I created my gradient. (I deleted half of the gradient so that you can see how it looks on top of the actual image)
It’s very important that the details of the depth map match each object accurately, otherwise you will not get the result you’re after. Make sure you create the details of the depth map on different layers because on the last step you will merged them.
I painted the blue ball in black because I want it to be in focus and I gave different shades of gray to the other balls. The yellow ball (which is the furthest away form the blue ball) is painted in a very light shade of gray, almost white so it will be the most blurred of all. The blue ball will not be blurred at all because I painted it in black.
So, the depth map acts pretty much like a layer mask but instead of controlling transparency, it controls the amount of effect applied.
After you got all the details, merge the gradient layer and the details on one layer, go to channels, create a new layer and paste the depth map.
The next step is to apply the Lens Blur from the menu Filter>Blur>Lens Blur. Use your alpha map as source and apply the desired amount of blur.
If your original image is composed by elements on different layers, you must merge them first in order to apply the blur to all the elements of the composition.
You can clearly see the gradual blur on the image above. Keep in mind that not all depth maps are as easy to create as this one.
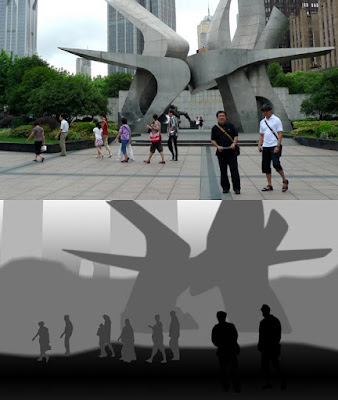
This a a more complex one. Also make by hand using the Pen Tool in about 25 min. The amount of objects you isolate depends on the selective you want to be when it comes to create your depth of field.
Result (note: the people behind the 2 men should be darker because there is too much blur applied to them)
Tutorial From http://www.psdbox.com/
Related Article : How to control Depth of field


