One of the easy ways to make dramatical photos, is backlighting the subject of the photo. Backlighting in photography is done by placing your main light behind your subject facing you and the camera from the front.
With backlighting it all comes down to two options, really:
- Exposing for the background, thus rendering your subject as a silhouette.
- Exposing for the subject, and blowing out your background.
- Through some fill light to help illuminate your subject from the front. This way you cut down on scene contrast, thus be able to capture both your subject and the background correctly exposed.
- Bracket your shots so as to get a few, various exposures of the same scene and then blending them all together back in post-production and coming up with an HDR rendition of your scene. (read about exposure this one or this one )
Middle Grey
The camera metering is designed to give correct readings under average circumstances. This means that the camera would look at a scene and try to render it as average reflectance (18% reflectance), which is middle grey (a value right in the middle between pure black and pure white). When a scene contains too much bright, however, the camera tries to render it as average so it darkens it causing under-exposure.On the other hand, when a scene contains too much dark, the camera tries to render it as average so it lightens it causing over-exposure. We as human beings see in color rather than black and white, and there are colors that are considered average. Meaning, they reflect an average amount of light, which is around the same amount that middle grey reflects.

Shoot the silhouettes
Taking advantage of backlighting can often yield some really interesting silhouettes.The key to great silhouettes lies in exposing for the background. You can be sure to produce a great silhouette each and every time, by simple following these little tricks:
- set your camera to manual mode
- take your meter reading off your background, while not having your main subject present in the frame at the time.
- Lock in your setting (or since you’re shooting in manual mode, just leave them as is), and then re-compose your frame to include your subject.
- Observing that the meter reading will change now that the scene has changed, do not alter your previous settings. Just take your shot.

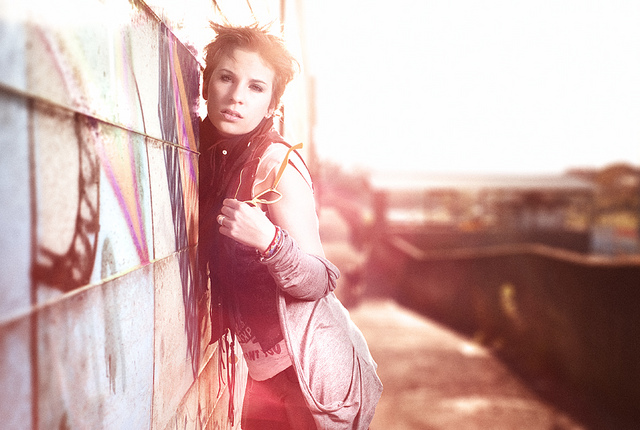
Exposing for your subject, blowing out the background
On the other hand, if you’re more concerned with capturing your subjects properly exposed than you’re with shooting a dramatic silhouette, then you should be sure to take your meter reading off your specific subject. To correctly expose your subject when backlit, make sure you follow the following steps:- set your camera to manual mode.
- Set your metering mode to spot metering, for the most constrained reading possible.
- Point your camera at the subject, making sure the center metering point along with its surrounding circle cover nothing but the most important part of your subject: in case of a person that would be the face, in case of a landscape that would be a river or perhaps a tree (depends on your focal point and your goal behind the shot).
- Take you meter reading with your main subject in the shot, and preserve the correctly indicated aperture, shutter speed, and ISO settings.
- Leaving your settings unaltered, recompose your shot including the bright background and whatever there is that you wish to show within your your frame.
- Finally, take your shot!