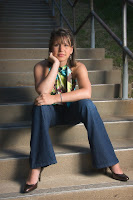
Here's four types of outdoor Lighting you'll commonly find :
Front Outdoor Lighting
Front Outdoor Lighting, the light coming over your shoulder and falling on the subject, is flat. It hurts the dimensionality of the subject and makes them seem lifeless. You need fill light here just like you will side lighting.Side Outdoor Lighting
Side Outdoor Lighting, coming from 45 to 90 degrees of the subject is good for landscapes, where medium to heavy shadows sculpt the view and give depth and sense of scale. But it's cruel to people. The light needs to softened when you use it. You'll need fill light. A reflector should do the trick. A number things work well as reflectors in this type of light. A sheet of printer paper, a sheet of construction paper, a sheet of cardboard will bounce back a warmer light. Aluminum foil, the shinny side or the dull side, crinkled or flat.Top Outdoor Lighting
Top Outdoor Lighting out of doors is around noon. The worst time to shoot is between 10 am and 2 pm because of this type of lighting. This light casts the eyes in dark shadows and the mouth hides in the shade of the nose. Plus everything else in the scene is two dimensional and uninteresting. Don't bother. This is perfect time for planning, and a three martini lunch. When it was common to shoot on film each roll came with a spec sheet giving the characteristics of the film. It also included a simple guide to light. My favorite outdoor light was called Cloudy-Bright. When the sky was lightly overcast. The sun was still visible but diffuse, It's visible in the sky but you could look at it without hurting your eyes. It lit subjects evenly with shadows of light to medium density. You could see into the shadows and even make out some of the detail. The next time there's a day like this go outside and look around. This is normal photographic lighting, the lighting you're trying to achieve, both indoors and outdoors.Twilight Outdoor Lighting
Twilight outdoor lightning is good time to shoot too, the light has a mysterious and romantic quality and scenes are easily imbued with emotion. But here, as in most cases, you'll need fill light for your subject.The big difference is that twilight is cold light. The light shifts toward the blue end of the spectrum. The blue end is considered cold, the red end, the opposite end, is considered warm. So you may want your fill light to be reddish. There's a Vimeo lesson where they used a glass of whiskey in front of the flash to make the light look warmer. That's a great idea. What other things can you think of to soften light? Gauze or other fabrics? Cellophane, plastic food wrap? These things can go over the light or the lens. It's up to you, but know the rules.
When you're taking light readings many timesyou will find the range of light is too great. A simple rule is to expose for the highlights and let the shadows take care of themselves.
Related Article:


